
oakbydesign
01423 593 794

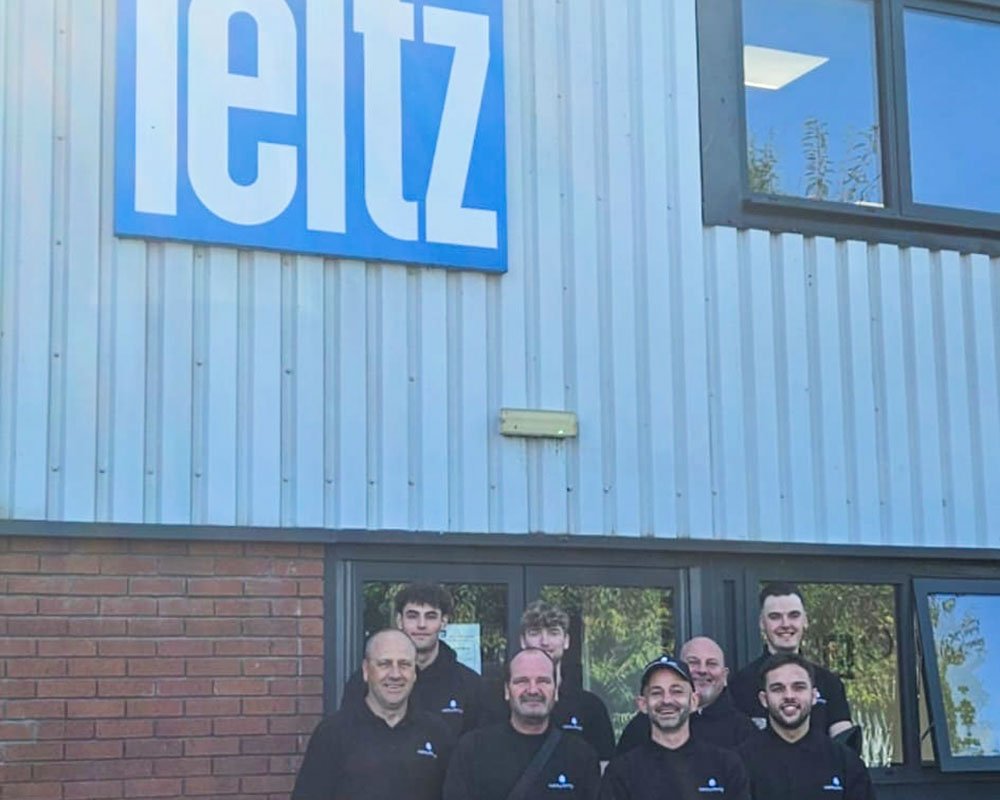
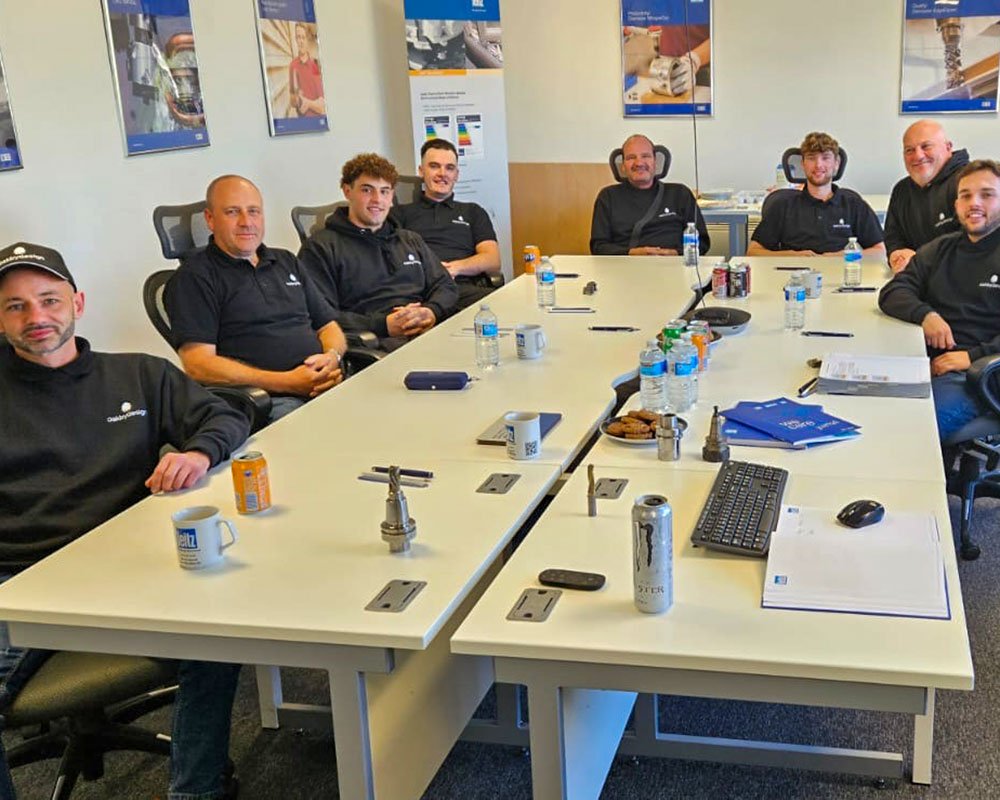
Oak By Design’s team of site and workshop joiners enjoyed a rare day off the tools!
We had the pleasure of being invited to our local Leitz Tooling UK workshop in Leeds. Already a customer of Leitz for all our machine tooling and sharpening needs, Jack Rogers their technical sales consultant thought it would be beneficial to our company for our joiners to attend a dedicated seminar at their workshop.
The seminar began with an exceptionally interesting insight into the history of Leitz dating back to their founding in Germany in 1876, right through their innovations to the industry leading international company they are today.
We were then given a detailed guided tour of their workshop to see their state-of-the-art tool sharpening machinery, robots, and their expert team of engineers in action!
A return to the conference room at lunchtime was warmly welcomed by an array of food and drinks provided by Leitz.
This was followed by Jack and his colleagues, Lance (service centre manager) and Neil (technical sales representative) sharing their specialist knowledge of tooling, CNC manufacturing processes and innovative ways to speed up our company’s production and efficiency.
Leitz, one of the world’s leading innovators in precision tooling, design, manufacture, and sharpening methods had all sorts up their sleeves for us.
Gone are the days of sharpening your own tooling on a Friday afternoon!
As a woodworking company with an expert team of joiners, we already have a great understanding and a vast amount of experience in the machine tooling that we use, yet the expert knowledge they were able to share with our team was second to none!
All in all, an extremely interesting and informative trip.
Why stop there……
As recommended by Jack, our company booked the team in at Flight Club in Leeds City centre for a fun, social darts team-building activity inclusive of more food and drinks. The whole team thoroughly enjoyed the day, taking away more expert knowledge under their belts and will be dealing closely with Leitz for many years to come.
The Oak By Design joinery team usually has 1 or 2 apprentices working and learning within the team.
They usually work for 4 days in the workshop during term time and have a day learning at York College on the Architectural Joinery Apprenticeship course.
As part of the final third year of the City and Guilds course, the apprentices need to have a basic awareness of a CNC (computer numerical control) machine.
Fortunately, for our apprentices, we have a CNC machine, so they get plenty of the opportunities for ‘on the job’ training.
However, some of the apprentices on the course work for companies that don’t need, or have a CNC machine. Barry, our Operations Manager, was recently approached by Joe Clancy, the Construction Assessor at York College, to ask if we could offer some basic CNC Awareness Training for 3 students whose employers couldn’t offer the training.
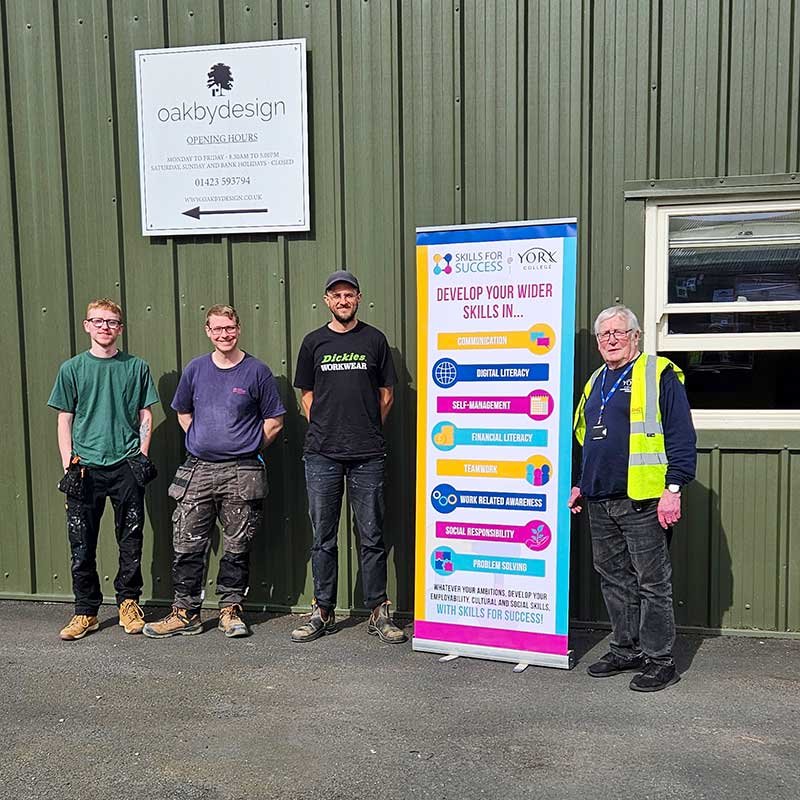
We were really pleased to be able to help out, and recently welcomed Dave, Ian and Tom to our workshop, and they spent the morning with the Oak By Design team being shown the CNC machine ‘in action’.


The machine is used for a variety of uses, and can be used to speed up some of the more laborious tasks such as repeatable, complex work, including oak frame components, curved elements and intricate pockets.
We use the CNC for manufacturing certain components, which require multiple precise set ups including external door and window multipoint locking systems.
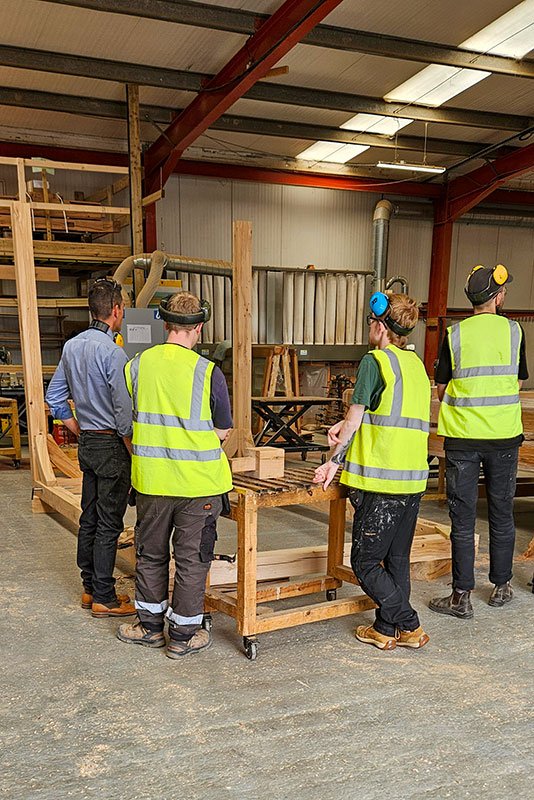
Barry gave the students a tour of the showroom. Our showroom highlights the majority of oak products that we regularly manufacture. We have a full-size glazed oak sunroom, open oak porch, oak trusses, oak staircase, and RSJ covers, etc.
He then showed them around our workshop, showing the full ‘journey’ of the oak.
We use air dried oak and kiln dried oak for our oak products, and these are stored separately according to the thickness, and the type.
He then showed them how the timbers are selected, how we plane them and which piece of wood working machinery was used, and why. The students obviously already had some knowledge of this, but were interested in the aspects of working with oak.
We use a lot of traditional methods for timber framing, including mortice and tenon joints, together with oak pegs, using dry joints, which don’t therefore require adhesives etc.

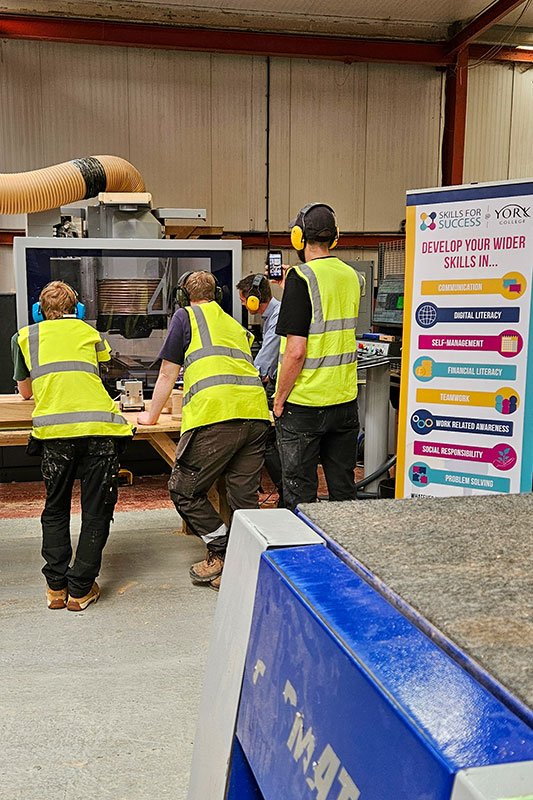
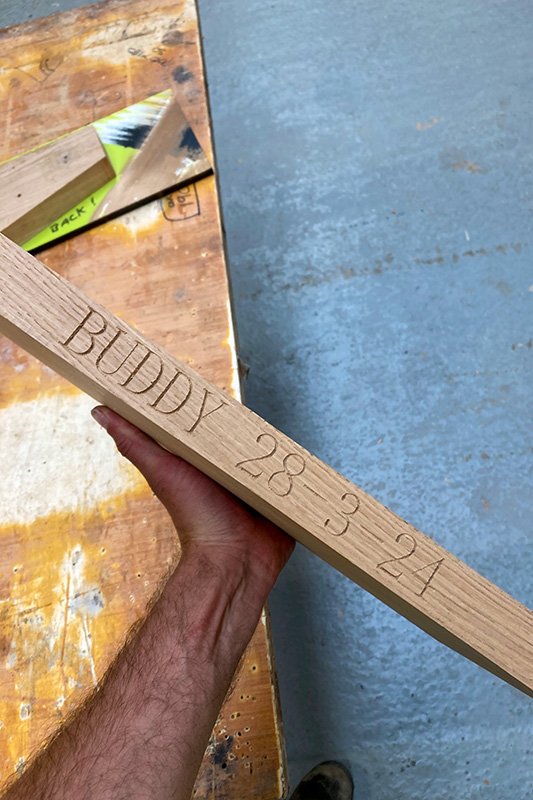
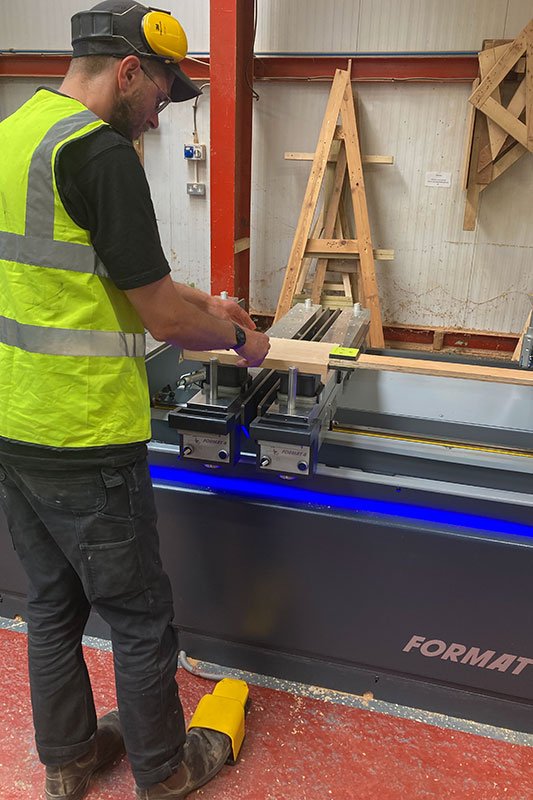
Josh, our CNC ‘expert’, gave each of the students the opportunity to use the CNC machine to engrave an oak chopping board for themselves, so they managed some ‘hands on’ work.
Speaking to Joe afterwards, he said that the 3 students had returned to college, quite excited about what the machine was capable of. One had commented, “Joinery is not going to be what we thought it was!”
Joe felt that the morning had given them lots of ammunition for their portfolio of work and that they had thoroughly enjoyed the visit to the workshop, and being able to see the CNC in production, and being able to engrave the boards.


They enjoyed seeing the different elements of the manufacturing process with the different types of oak from their tour of the workshop and showroom with Barry.
He also said they really appreciated learning about the CNC machine itself from Richard, as he had explained everything really clearly and informatively. Possibly a new career in teaching for Richard?
Bucket List – Run 100 miles in a day!
Why? – Well, the reasons that come to mind would be for the amazing experience, the tough challenge and knowing that I would become a member of an elite club that less than 0.01% of the population have joined.

An ultra marathon….any distance greater than marathon.
At 6.00am on Saturday 13th April, I lined up to complete the Chester 100, an off-road race of approximately 104 miles with the aim to complete this in one day. A total of 190 other runners took to the start, looking to follow the canal tow paths and woodland area surrounding the town and villages of Chester, Widnes and Warrington.
With months of training in the bag, the excitement built towards the countdown of the race. No more training, just the physical and mental challenge of completing the course within the cut off time of 32 hours. The weather was on our side. It was cool, cloudy with a light breeze.
Most ultra-marathons are not about speed, they are about endurance, will power and the pure determination to finish.
Along the beautiful course would be twelve checkpoints or aid stations where the competitors could refill their water bottles and snack of both sweet and savoury snacks provided by the event team (GB Ultras).
The key to endurance events is to pace yourself in the early stages. Too quick and you will pay the price later on. Running at a conversational pace, I managed to chat to the other runners learning their ‘why’ and the training they had completed. This distraction saw the first marathon come and go; how hard could it be?
The first three aid stations came and went, where the terrain became more technical and the route decided to follow the water-logged fields coupled with large areas of deep mud and large mis-shaped divots. The muddy and steep wooded sections were just as challenging making the footing both slippery and unforgiving. Mile upon mile of challenging terrain followed by endless canal tow paths meant the mental game had begun.


Focusing on eating and drinking plenty at the aid stations, allowed my body to refuel and to complete marathon number two. They always say a 100-mile race doesn’t really start until mile 70 as this is time when you become fatigued, the sun goes down and your nearest running buddy is somewhere in the distance, front or behind.
The majority of the 5,000 feet of elevation had been completed with a small sting in the tail to come at mile 75. At 3.00am, having not spoken to, nor seen anyone for a couple of hours, I ventured up the last hill to a lonesome trgi point and admired a view across the Mersey. It’s all downhill from here my subconscious was saying. The last aid station, number twelve was a welcome site, knowing I had just over 11 miles to go. Breaking the run down into manageable pieces make a huge difference knowing each section is a small run.
Upon reaching the finish, a local sports hall, each competitor ran a lap of the running track to eventually cross the finishing line. There were high emotions of relief and feelings of pride on completing the 104 mile course. The top 100 finishers were awarded with a gold buckle, something to be treasured and admired. Off the 190 starters, nearly 80 DNF’d and I managed to come home in 33rd place.
My journey wasn’t finished.
My journey to Chester was enhanced by the complementary use of a motorhome that was parked in a local campsite! This was situated just over a mile away and therefore, one more mile wasn’t going to hurt. The motorhome was very kindly offered by Lowdhams of Nottingham, specialists in providing quality caravans and motorhomes. My wife and I met them at the NEC during a trade fair and they explained they would like to support us over the weekend. Many thanks Lowdhams.
Running over 100 miles and completing the course was a great experience. It challenged me in numerous ways, but it was an enjoyable, challenging and emotion rollercoaster that I cannot wait to ride again!
Clever Association is an award-winning technology consultancy, advising, designing and implementing audio-visual, lighting control and integrated solutions across the UK and beyond.
Based in Knaresborough, they have a proven track record for design-led technology for homes, hospitality venues and commercial spaces.
We recently had a demonstration of some of their solutions, including an ultra-discreet loudspeaker package from Italian manufacturer K-Array.
At just ten centimetres tall and two centimetres wide, these incredible speakers can be used inside or out, perfect for adding high quality music in an oak-framed building or garden entertaining space. They punch way above their weight, so much so that Clever Association deployed them throughout the magnificent Grantley Hall near Ripon, where solutions had to be discreet but performance could not be compromised.
To visit their website : www.cleverass.com or https://www.instagram.com/cleverassoc/
Photo’s are by Jonty Wilde – www.jontywilde.com and https://www.instagram.com/jontywilde/

We’d like to introduce you to a fantastic York based kitchen design company, Studio 35.
Based in the heart of York, at number 35 Blossom Street, they are a highly experienced team with a passion for design & excellence in everything they do.
From concept to completion, virtual reality design visuals through to full project installs, they offer a friendly and professional service.
They deliver beautifully elegant, and functionally personalised kitchen & living environments which are as individual and unique as their clients.
They encourage potential clients to visit them at their welcoming showroom in the city.
Their showroom showcase next125 & Schuller with Miele, Neff, Siemens and Bora appliances and is complimented with a vast array of finishing touches.
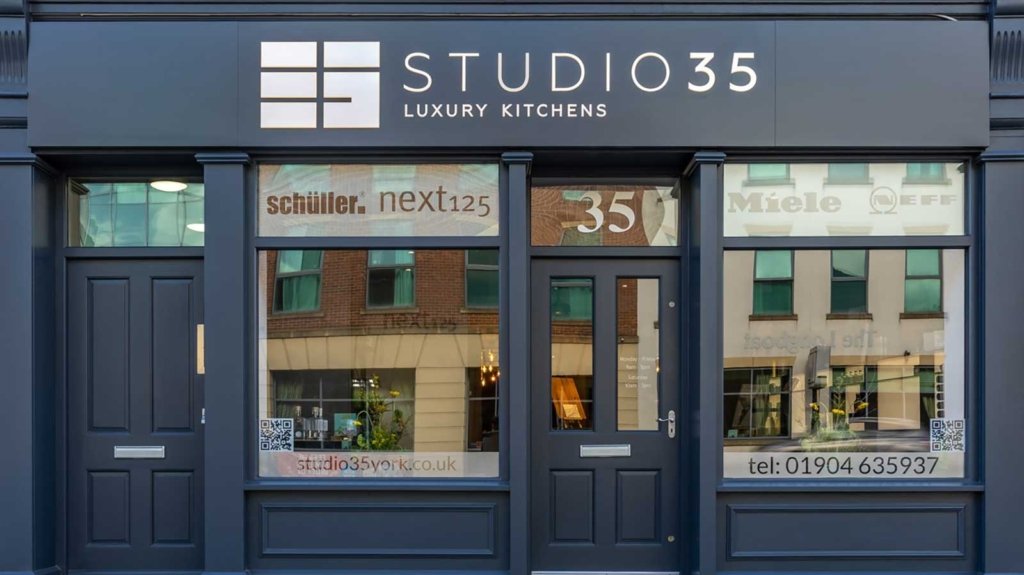
Why not contact Gary, Rob or Jess to discuss your next kitchen project?
https://www.studio35york.co.uk/
Oak By Design are proud supporters of York RLFC’s 2 teams: – The Knights (men) and The Valkyries (women).
The Knights are on a journey to be in the top tier of rugby league, The Super League, with this likely to be happening by 2025 at the latest.
The Valkyries, who are already in the Women’s Super League, won the league leaders shield last season, and have started the 2023 season unbeaten, and favourites to secure silverware.
York RLFC are not only the first Rugby League club to give the girls their own identity, but alongside the Leeds Rhinos, one of the first to pay them professionally.
Finally, in a ground breaking move, Valkyrie player Hollie Dodd has been signed by Australian side Canberra Raiders – in a first for British Rugby League.
As well as the on-field rise, their Community Foundation continues to support our schools and communities through free rugby league sessions, school and school holiday programmes, the creation of a Wheelchair team, and the continuation of their Learning and Physical Disability Team.
They continue their Youth Development Pathways in the Excel Programme for the boys, and the Rise Programme for the girls. These pathways enable 11–16-year-olds to access life coaching, nutritional advice, and high-level rugby coaching at their state-of-the-art facilities in York, while still allowing them to represent their respective community clubs. These programmes have produced a number of first team players of the last couple of years, including Young Player of the Year nominated Knights winger, AJ Towse.
As they enjoy this journey and rise to success, they also strive to assist local businesses with their own growth in partnerships through sponsorship, showing that their commitment to doing the right thing involves both on and off field performance.
Speaking to the club’s owner, Clint Goodchild, regarding his vision of Rugby League, and sports in general, Jamie was really pleased to hear that his vision focuses on an all-inclusive value for not only rugby enthusiasts but for everyone to enjoy a day full of atmosphere, entertainment and great rugby.
To experience this, as a thank you to Oak By Design for being friends of the club, they are offering all their staff and customers the opportunity to claim FREE tickets to the Knights v Toulouse match at 6pm on Saturday 5th August at the LNER Community Stadium in York.
To claim, please complete the brief form via the link below, and tickets will be emailed to you before noon on the day of the game.
https://forms.gle/jzrARsrpEB5XLzwx5
Louisa is a talented and experienced permanent make-up artist, based near Harrogate, who has been providing life changing services to her clients for several years now.
For those who are not familiar with the term, permanent make up is a cosmetic tattooing procedure that involves depositing pigment into the skin to enhance and define the features of the face. This can include eyebrows, eyeliner, and lip liner.

The procedure is becoming increasingly popular as people seek out ways to simplify their daily routines and enhance their natural beauty.
Whether you are looking to enhance your brows, define your eyes, or add some colour to your lips, Louisa has the expertise and experience to help you achieve your desired look.


But what really sets Louisa apart is her commitment to providing a personalised and customised experience for each of her clients. She takes the time to listen to their needs and desires, and works closely with them to ensure that they are completely satisfied with the final result. Her warm and friendly demeanour also makes the entire process feel comfortable and relaxed.
So, whether you are a permanent make up veteran or a first-timer, we highly recommend checking out Louisa and her amazing services. With her talent, experience, and dedication to client satisfaction, you are sure to leave feeling beautiful and confident!
Louisa can be contacted via:
Email: info@louisascott-priestleyspmu.co.uk
Phone: 07512 661903
Instagram @lsp_semipermanentmakeup – https://www.instagram.com/lsp_semipermanentmakeup/
Facebook: Louisa Scott-Priestley Semi Permanent Make-Up https://www.facebook.com/louisascottpriestleyspmu
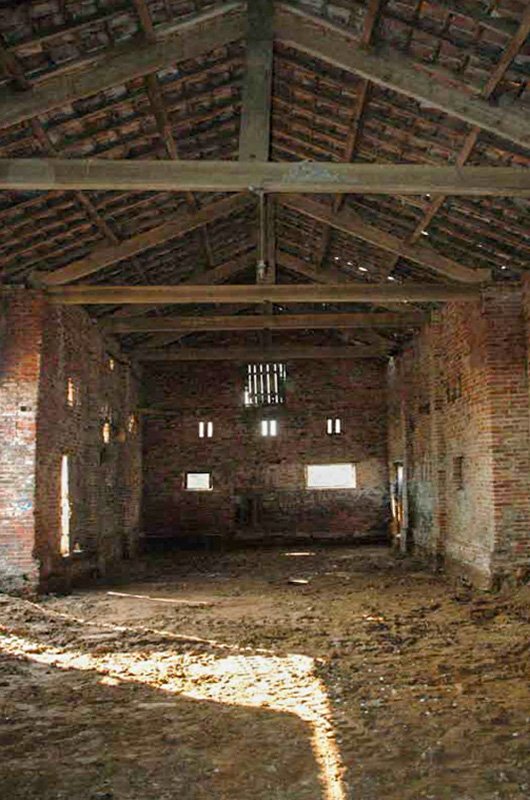
The amount of work needed to clear the inside of the barn was more than we expected; much more. For a team of labours, no problem, but Sarah and I, well, we wanted to look back and say, we did this!
We knew the earth floor had to be removed but was unsure how or what to replace it with. We enlisted the help of a structural engineer. He was on hand to provide advice on the sub floor, its design and makeup. He also advised on any oak beams we wanted to introduce and the roof structure in its entirety. The barn conversion would have vaulted ceiling upstairs adn consist of 7 feature oak roof trusses.
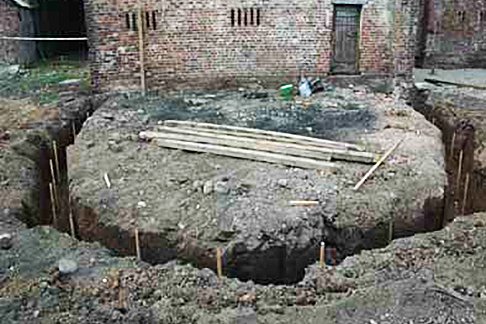
We were advised the barn would need a couple of trial holes near the base of the building to establish if there were any footings. From here, we could decide whether underpinning was necessary and the condition of the ground beneath. We found approx. 800mm of footings or existing brickwork continuing below the ground, sufficient not to underpin, a costly exercise we did not really need or want.
The floor would be dug out to a depth where a replacement layer of hardcore and concrete would create a raft like structure at the required height for the two-storey build. The barn conversion had a restriction that meant we were not allowed to increase the height of the original build. This proved difficult to calculate allowing suffice head height on both the ground and first floors. We learnt about walls plates, depths of screed, the amount of insulation required and other dimensions to allow us sufficient headroom on both levels.
With the levels calculated, the whole team, well, Sarah and I, got to work. The barn contained some old wooden boxes, a rotten staircase and several old tractor parts completely beyond use. Our barn conversion was also home to many hundreds of pigeons and it’s plain to say, it felt like grime busters of the TV. We decided to hire a small mini digger and dumper to speed the process up.
Now feeling like ‘proper’ builders, the barn conversion tok shape by stripping the inside to create a bare shell from which to work. It was towards the end of March and the weather was average for the time of year. We seemed to progress well as a team, myself controlling the new toy digger and Sarah struggling with the rear wheel steering of the dumper.
Suddenly, above the noise of the engines, Sarah shouted “Snake, I’ve found a snake!” As the typical man, I thought Sarah may have stumbled across a larger than average worm and decided to investigate. Sarah seemed serious, very serious. So, now armed with pick axe and a rescued dustbin lid, looking like a gladiator from the similarly named film, I progressed slowly towards the creature. Sure enough, a small snake laid there, tasting the air with its forked tongue.
I quickly changed what seemed, slightly exaggerated weapons, to a spade and clean container. We guided the snake carefully into its temporary home and later had it identified as a common grass snake by a local pet shop. They kept it in for observation and would release it later when the weather got better. The joys of a barn conversion!
Whilst clearing the barn, we unearthed some clay floor bricks and these were put to one side to be reused later. It had taken just over three weeks to fully clear the barn, remove the subsoil and create a cavern like opening ready for the concrete slab. The barn conversion now had a blank canvas.
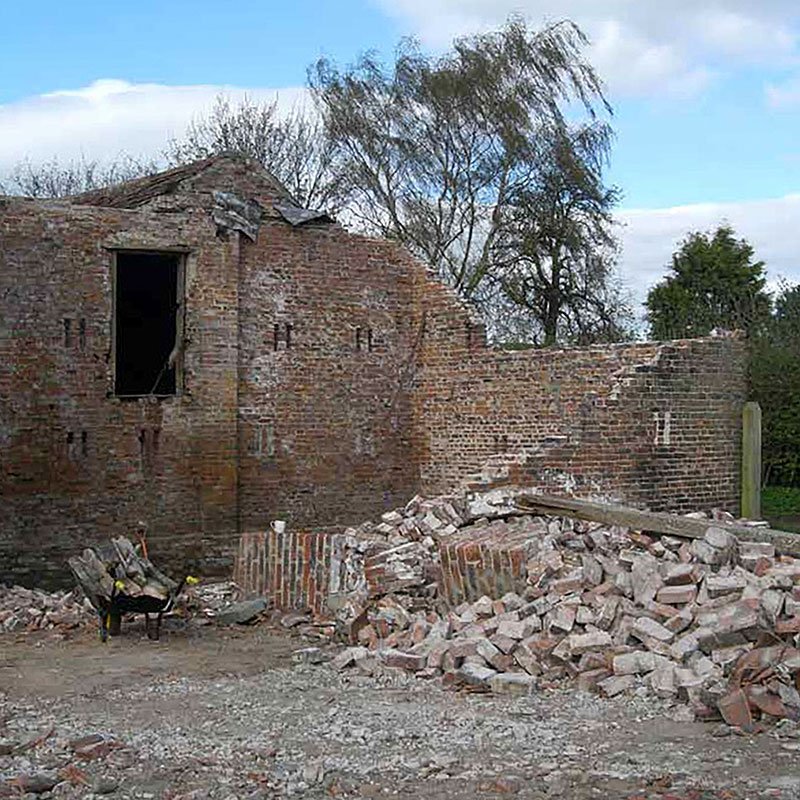
It was the Saturday night of Easter when we received a call from York’s fire brigade. We were fortunate to live only seven miles away but the time it took to reach to barn seemed to take forever. We had been told ‘your barn has collapsed and it needs attention now!”
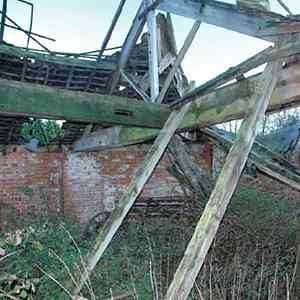
We had no idea as to the extent of the damage or how much, if any, of our beatiful barn conversion remained. We arrived at the entrance to blue flashing lights and ‘do not cross’ blue tape used at police incidents. Also present were the council, as a bridle way ran alongside the drive and firemen using thermal imaging equipment to search for possible bodies under the rubble. Nobody knew if children had been on site and the gable end looked very unsteady. Our barn conversion destroyed in a few seconds.
Looking optimistically, only half of the barn had collapsed. We had no roof, although we would have had to replace this anyway, some walls and all the debris would need to be removed again. At this point, the dream of completing a barn conversion seemed never ending task.
We later found out the reason for the collapse. A tie beam in one of the existing pine trusses had a rotten end. These roof trusses were load-bearing, meaning they held up the entire roof. We were extremely fortunate not to be working at the time and thankfully, no-one was hurt.
The walls would have to be rebuilt.
As the barn was built using a rare two inch (50mm) handmade reclaim brick from the 19th Century, the decision was made to integrate a new, but old looking, brick in to the mix..
Although currently no longer available, we used a personally designed and manufactured brick from Belgium. It incorporated all the right features and colours associated with a reclaim brick making a near seamless transition between old and new.
Bricklaying was one of those trades that is made to look easy. We employed a local bricky and we laboured alongside him. The brick match was good and coupled with using a lime-based mortar, the result would be more than acceptable. The walls were gradually rebuilt and window openings positioned accordingly.
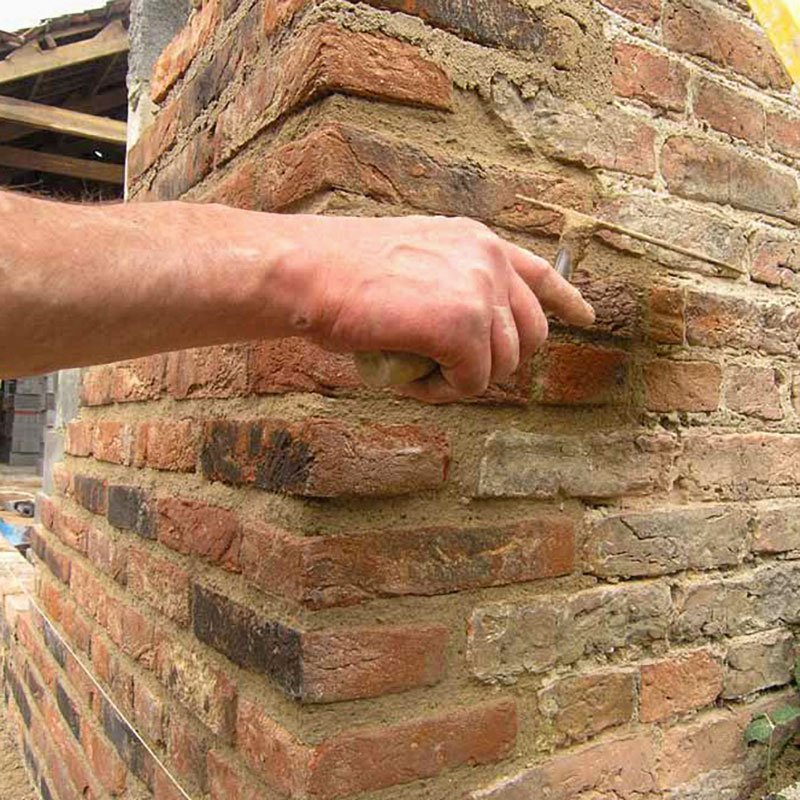
The same bricks had to be used on the ‘wheelhouse’ as this section of the building contained no footings and a complete rebuild was necessary. The ‘wheelhouse’ was to become the barn conversions main feature, the kitchen, a single storey with impressive vaulted ceiling with exposed oak roof trusses. Having now mastered, well enjoyed, using the mini digger so much, I calculated the footprint of the six-sided kitchen and dug the footings after a very amenable and friendly conversation with our local building inspector.
After ordering the sand, lime, cement, insulation, blocks, wall ties and our very own two-inch handmade bricks, we started the building aspect of this conversion. Two months had passed and it seems we hadn’t got anywhere. As we were at the barn most days, you do not see the progress you make.
The month of April and first week of May had seen the barn conversion transform. After the collapse, we re-cleaned the site and installed the internal drainage. The pipes were laid to accommodate three upstairs toilets (two ensuite) and the downstairs cloakroom off the main hallway.
These were laid at an incline to ensure all waste water runs into the inspection chamber located outside. This was a long job as we had to core drill 4 holes through 350mm of brickwork and due to the angle of the hole and its location, the four holes took over 4 hours to complete.
A damp-proof membrane or Visqueen barrier was laid over the now sandy floor and was seated into the deepened trench around the perimeter of the barn for the inner skin of block work. The barn conversion would retain most of the outer brick skin and be tied to aninternal breeze block wall.
Looking back at the first picture we took; we could see the progress and to date were ahead of schedule and under budget. The block work was started, together with some internal exposed brickwork we intended to have in various areas around the barn.
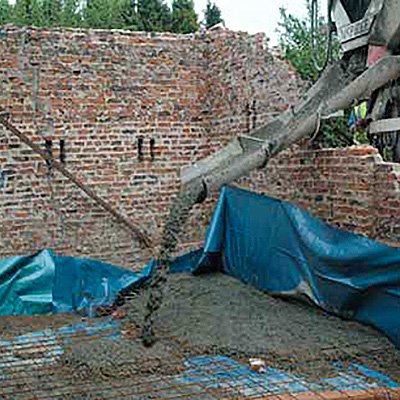
After raking in help from two of our staff and our trusted bricky John, we ordered 22 cubic meters of concrete. All of which had to be laid in one afternoon! Having never done this before, the learning curve was steep, but worth it.
With wheelbarrows at the ready and a good system in place, the concrete flowed and made a tremendous difference to the whole feel of the barn.
It was June and it had got to the ‘are we getting anywhere’ stage. It was true to say that all the hard work in preparing the ground-works, footings and drains are not normally appreciated, as most of this is covered up with hardcore or concrete.
In early October and although on budget, the project had slowed significantly due to bad weather and time spent back at Oak By Design. As previously mentioned, the forgotten cost for scaffolding raised its head when John the bricklayer jokingly asked if we still wanted a two-storey building! At this stage we also needed to forward think about the roof and the 7 structural oak trusses!
The sun was slowly setting and with it, his motivation to do anything. He sighed and grabbed the crumpled newspaper off the edge of the leather chair.
He had already read the whole thing the day before, but what else was there to do on a Sunday afternoon? He carefully unfolded the paper, trying to get it back to its original state, and started skimming through it again, hoping he had missed something the first time.
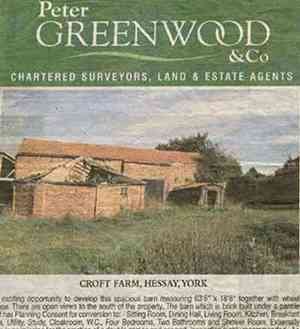
He always loved the property section, daydreaming about the lives of others, and the pictures of kitchens and bedrooms.
On page 31, he stumbled upon a barn that needed converting. The photo showed an old, abandoned building from the 1800s, and he could not help but think what kind of magic he could work in there.
The description said the building was perfect as a barn conversion, with plenty of room for customization and improvement. He immediately started dreaming of the possibilities: a cosy living room with a wood-burning stove, a kitchen with beautiful oak countertops, and maybe a couple of bedrooms with mezzanine balconies overlooking the main living space.
The possibilities were endless, and he could not help but get excited about the prospect of creating my own little oasis in the countryside. He knew this would be an enormous project, but the thought of breathing new life into an old building was too exciting to ignore.
He wondered how he could convert it, what would it look like and evaluating the question, how hard could it be? The television was full of programs showing magnificent building projects, their challenges, and pitfalls. He stood from a matching leather chair, folded the well-used paper and laid it on the floor. That was nearly five years ago as he typed the first chapter of “The Barn Project.”
That person was me, Richard Penny. My wife, Sarah and I would like to offer our experiences and advice within this guide for you. We will cover the products we used as well as situations that, when looking back, we may have handled differently.
We’re ready to share our experiences, stories and products from our own barn conversion journey. From the initial planning to the final touches, we’ll share all the tips, tricks, and lessons we learned along the way. So, join us and let’s get started!
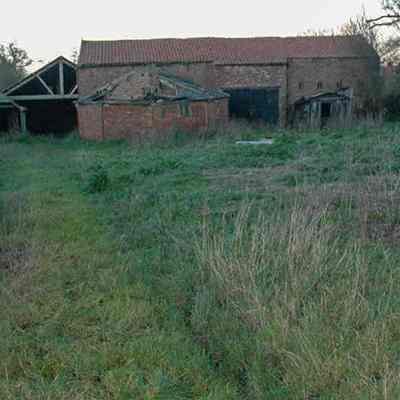
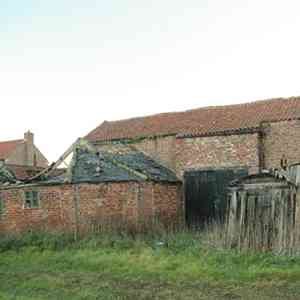
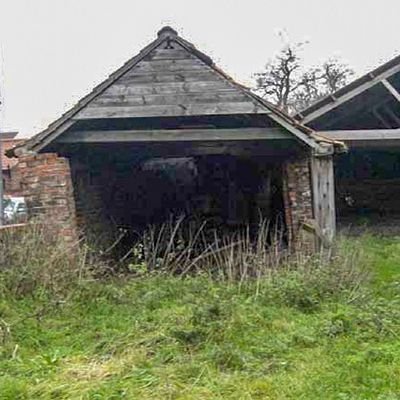
This guide is created to demonstrate the various possibilities and decisions that come into play when constructing a build. The photos within this guide illustrate the barn conversion we have created and the core products that our business offers.
The picture of the barn was carefully cut from the used newspaper and shortly afterwards, we arranged for a viewing with the agent. Trying to visualise a derelict building as your home required some out of the box thinking. We were use to a modern home and the surroundings it had to offer; the carpets, white painted doors, flat ceilings and painted MDF. The barn conversion would have to be different, we thought, very different.
What would it cost? Would it be worth it? Although very difficult to estimate all costs, so systematically we tried to visualise the entire build sped up over a few hours, writing down everything that popped into our heads, starting at creating the footings and finishing at painting the walls. Homework was needed to establish how many and how much of everything was needed. Although we were able to claim any VAT on most items, and this was a separate area that we needed to look at, we decided not to take this into consideration.
Its worth mentioning that at the time of writing, the barn conversion would be eligible to be free of VAT. Some items are charged at 5%, but this also be recovered.. Basically, if you are converting a ‘”building” into a “dwelling” and the building has been unoccupied for 10 years or more, the VAT rules will be in your favour. To be on the safe side, we also added a further 10% for a contingency fund as you will always forget something.
In our case, the scaffolding, all of it! A cost we could not get around.
Whilst running Oak By Design in Tockwith, it was decided to embark on the project wearing numerous hats including project manager, quantity surveyor, labourer and many more. Naivety about the whole building process was, looking back on the build, a blessing in disguise; if we knew what was coming up, we may never have started it.
The barn was purchased in the March and the initial consensus was to clear the site of rubble, debris and other materials we did not need. We approached the barn conversion with the opinion of, why pay someone, when we can lift, carry, and work for ourselves? Through experience, this is not always the case. Who else would hire a JCB/digger at a high day rate without a qualified driver? It was toys for the boys, sitting in the large yellow machine faced with various levers, switches, dials, and pedals, having no idea of their purpose or function.
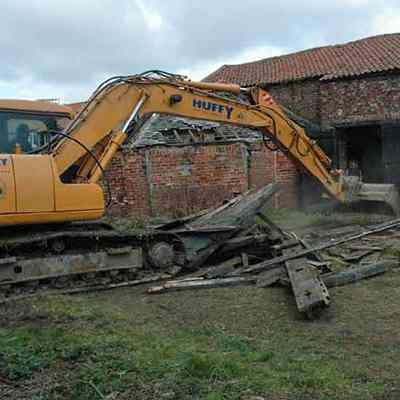
Fortunately, we had some land where many practice manoeuvre was made, perfecting the pirouettes, scoops and what seemed to be a 3D robotic-like approach.
The learning process was high, it had to be. With a clear canvas and architect drawings to work from, we were ready to start the build of our lives; the barn conversion!
It all started with a crumpled newspaper and a vision of what could be.
The barn already came with planning permission and a set of drawings showing the footprint and internal layout. Fortunately, there were no real planning restrictions since it was not located in a conservation area. Any materials used had to be like the ones previously used, such as bricks, roof tiles, and windows; these had to be approved by the local council.
We also had to adhere to the local building regulations, especially regarding the insulation of the walls and flooring. This was to ensure that the barn conversion was energy-efficient and comfortable for its inhabitants. We also had to consider the electrical wiring, plumbing, and heating, as well as ventilation and lighting systems. Any necessary fire escape routes had to be considered too. Once all the necessary paperwork was completed and approved, we could finally begin the exciting process of transforming the barn into our dream home.


Unfortunately, we did not have an architect, structural engineer, or surveyor, and, at the time, lacked experience in the building trade, so we had to look for professional help. Fortunately, we found a local architectural technician who was willing to provide us with detailed drawings for building control, such as for installation, footings, and u-values. We also acquired a set of working drawings with dimensions, roof sections, and more detailed work for the trades.
The barn was approximately 20 meters long and 6 meters wide, with an additional ‘wheelhouse’ and small outbuilding. We negotiated with the original owener that we would need to join the outbuilding to the main barn. This would create a 35 metre building provides impressive views from one end to the other.
We decided on the internal layout based on the most used rooms, their distance from each other, and the direction of the sunlight. We had no long-term plans, but we kept the design in mind for any possible buyers in the future.
The barn conversion was to have three double bedrooms upstairs, two with en-suite facilities,. Downstairs a large hallway/dining area, a family kitchen, lounge, conservatory, downstairs toilet, and study. The study could also be used as an annexe/forth bedroom with its own en-suite. We decided to remove another bedroom that was planned in the centre of the barn. Instead we create an entrance containing an oak staircase and galleried landings and expose roof trussses.
The barn conversion would require plenty of oak trusses, an oak staircase and possible oak conservatory. We’ll see!!
The plans gave us an initial layout, but as the build progressed, it was hard to visualize on paper, so the internal walls changed. In the end, we were able to create a unique and enjoyable living space that catered to our needs.
We also took advantage of natural light by adding skylights and larger windows to the design. We were also able to incorporate features like a large inglenook brick fireplace, built-in shelves, and custom oak work to create a cosy atmosphere. All in all, the final design was much different than what we had originally planned, but we hoped our hard work and creative ideas would pay off.
Part two will outline how we starting the massive task of clearing the barn of all the rubbish it had accumliated over the years. We will then the slow but enjoyable starting of the building process.
As an interior designer and owner of VA Heritage, I am often asked for advice on where to start when embarking on a project. If all you are changing is the colour of your walls it can feel easy and logical but if you are looking to completely transform a room or your entire home it can feel overwhelming.
Knowing where to start is key so if you are about to start your project hopefully these top tips will help make the process easier and more enjoyable.
This may not be an obvious one but understanding the building, its location and the neighbourhood is important.
Considering its history and what made the building special, especially if it is a traditional building, will ensure that you create a design which works with the building and does not stand out for the wrong reasons.
VA Heritage believes it is even more important if you are planning on selling on your property at any point in the near future to ensure it appeals to prospective buyers.
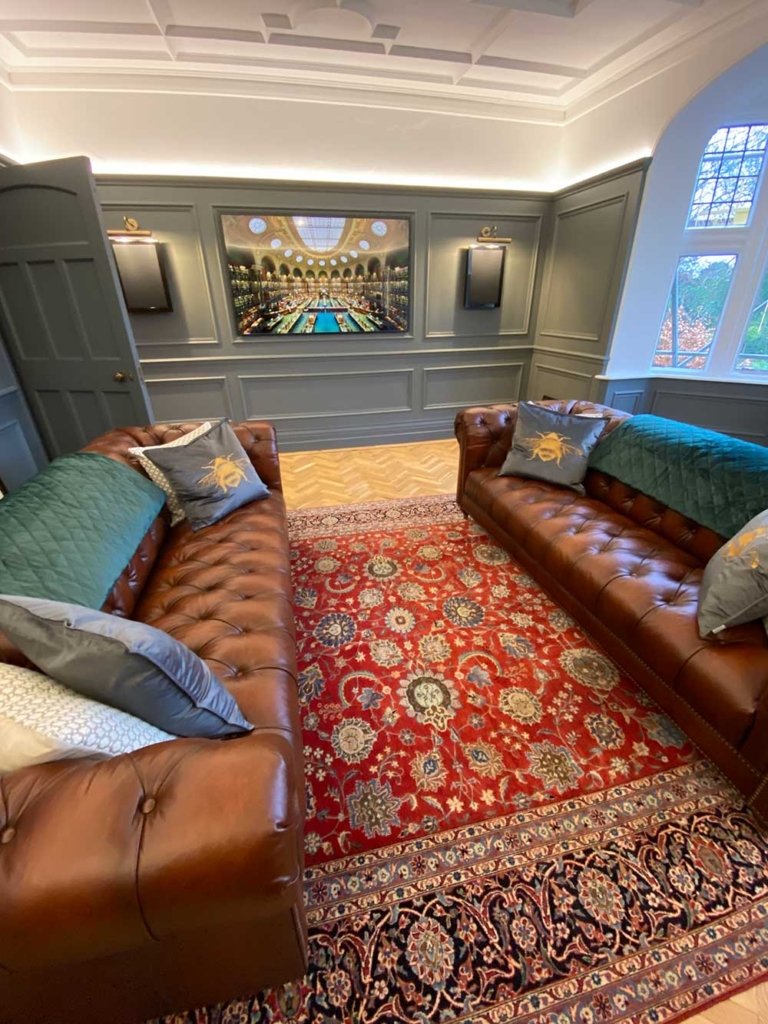
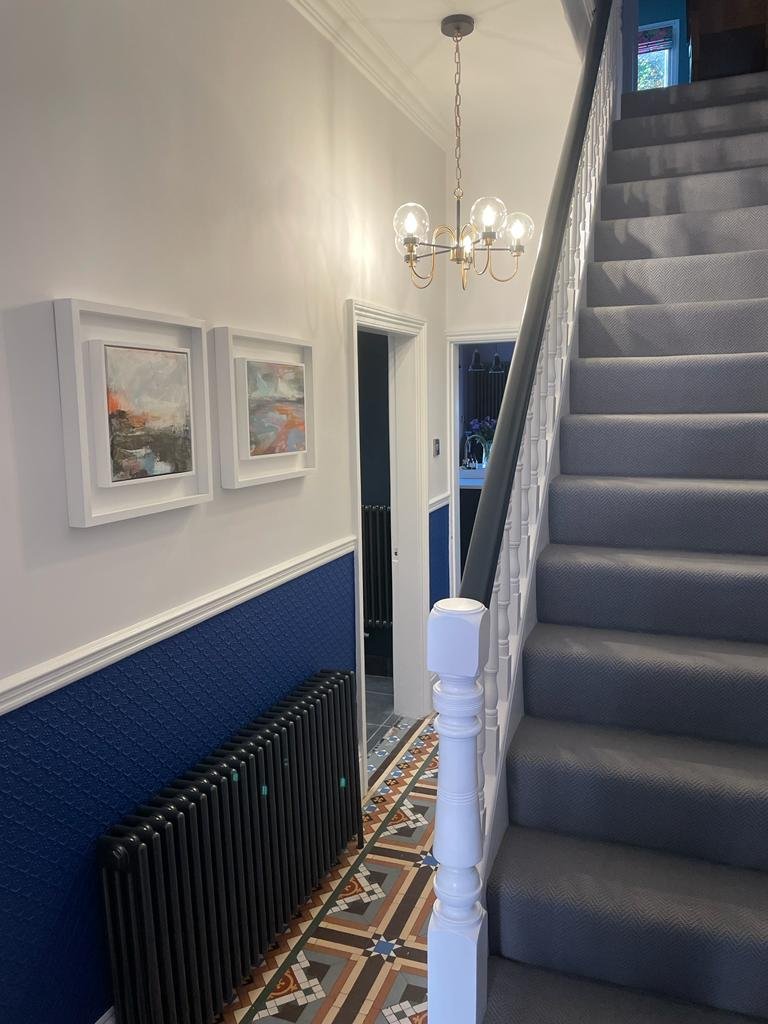
The way in which you move around your space is fundamental.
VA Heritage thinks that if you do not understand how the space flows, the way you interact with the space and what you need from it then basics such as where a plug socket is positioned and where you need a table lamp will be wrong.
If you are remodelling and doing any serious alteration work, this needs to be understood so that your home works for you and you are not forced to make compromises. It would be so frustrating to have to go without or locate a cosy reading area in space just because of where the plug socket is.
VA Heritage says, when you first start thinking about reworking your space, whether that is reconfiguring a room in its entirety, adding an extension or simply moving the master bedroom into what was the guest bedroom you need to engage with your Interior Designer, and Architect if required, as soon as possible.
They will help you to formalise your thoughts into concepts, review and establish a budget and a timescale for the work to be completed. You will have a clearer more cohesive idea of what you are trying to achieve and they will work with you to help you realise your dreams.
You will also have a better idea on lead times on any bespoke items and can make sure everything is ordered in time and in the right order so you are not left with missing pieces or storing furniture for weeks on end.
Doing all this work up front and on paper allows for revisions and amendments to be made with little, if any, cost implications in comparison to making changes when walls are erected and you are needing to make decisions quickly or the schedule will be held up.
VA Heritage says, making decision under pressure is never a good thing. It should be a fun process not a stressful one.
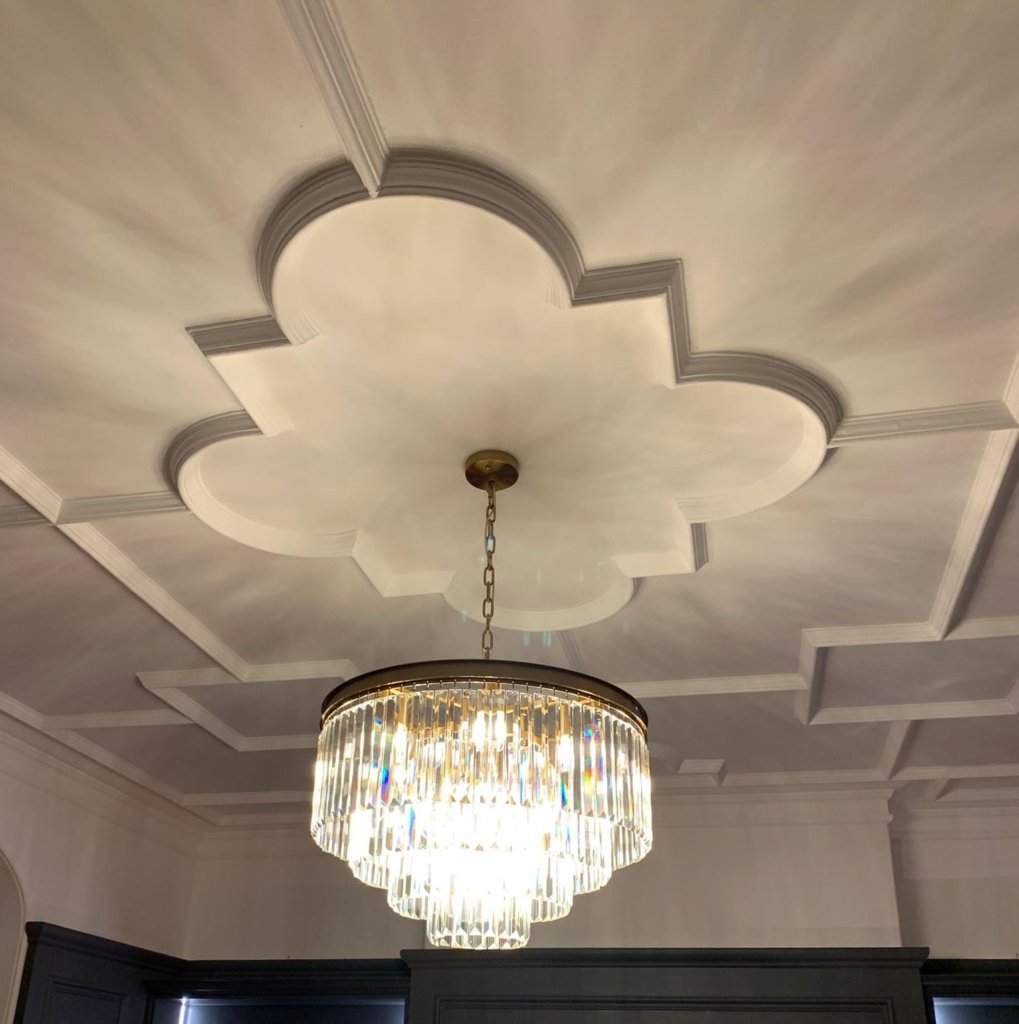
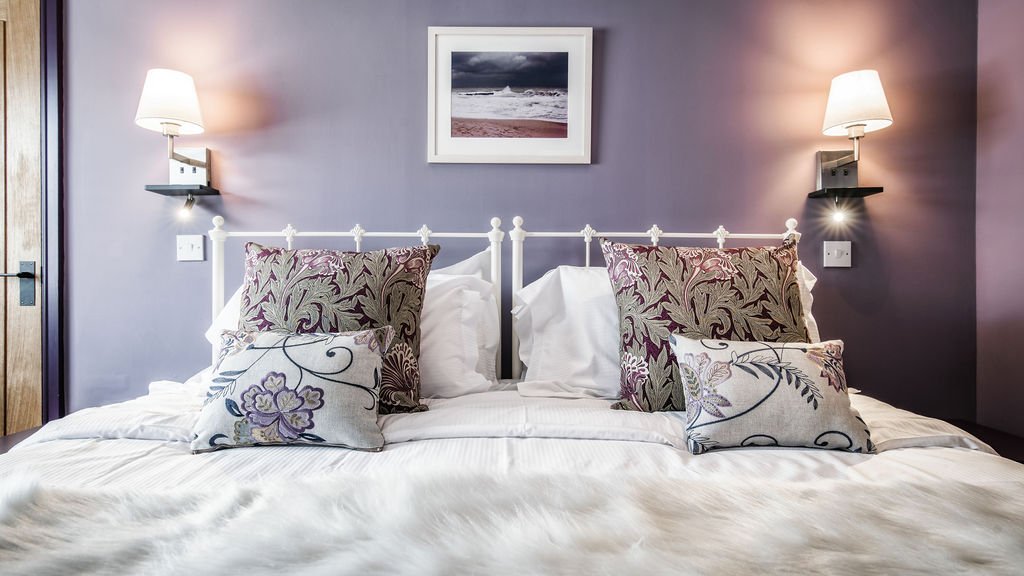
Stunning lighting will elevate a space. Combining floor, table, wall and ceiling lights will help create different moods in the same space.
You will be able to layer lighting to create subdued moods. VA Heritage understands that using different heights will also add textural interest to a space. Dimmer switches are a great investment so that on an evening the lights can be dimmed to allow for a more intimate and cosy space.
Don’t be afraid to mix and match.
Creating your sense of style need not mean it has to come from the same design era. Introducing contemporary elements into a more period setting can still look cohesive. Similarly, introducing a vintage piece in a contemporary home can help create a more lived in feel and be less of a show home.
Display artwork in every space.
Artwork should not be reserved for the main rooms in your home. Bathrooms, kitchens and even downstairs WC’s should also have artwork in them. Your personality should extend to every room.
Mood is a must. When entering a room it is important to be able to identify what the mood is. This could be bright and reflective, soft and elegant or plush and opulent. If you cannot identify the mood then something is missing.
Identifying your style. If you are struggling to identify what your style is, VA Heritage can help. Look at what you like to wear, this can give you a better clue than looking at wallpaper samples. Do you gravitate towards stripes, bold colours but only on your socks, are you all about layering different fabrics but always in beige? Once you have identified your style, think about how you can introduce this into your rooms.
Rooms don’t have to match. Rooms should have function, purpose and personality. A room that has none of these is a room that is lacking. A room does not need to match or be mirrored throughout the property, but it should have an identity and a common theme or thread. This could be an accent colour which is you use in every room to a greater or lesser degree or the same flooring that runs throughout. What you don’t want is to feel like every room could belong to a different person and be in someone else’s home.
Get inspired. Magazines are great to help present ideas but go and visit gorgeous shops, hotels, art galleries, museums, restaurants and anywhere else you can take inspiration from. Look at how they have played with the scale of items and the colours they have introduced. What are you drawn to and what leaves you uncomfortable? Use your initial reactions to guide you when it comes to selecting what to introduce into your home.
Be pragmatic. When it comes to placing items in a room consider what you are trying to achieve. It could be that you are wanting to draw attention away from an ugly corner of the room or make something the focal point. Alternatively you may want to create the illusion of scale and make the space appear bigger. Using lighting and reflective materials such as mirrors can help with this.
Create an element of surprise. VA Heritage understands adding a pop of colour that is unexpected or a piece of artwork which is slightly controversial is a great way of lifting the mood in a space whilst also injecting your personality.
It is vital that you work out the costs for each room you want to work on. Include everything from the structural work if you are having to underpin or move walls to the finishing touches to make it shine.
Add it all up and then determine if you can afford it. It is recommended that you have a contingency of 10-20% to help cover any unexpended expenses that can arise on projects. This may need to be more when renovating older properties as they can often lead to additional and unexpected work.
It might be easier to have a budget for the structural work and a separate budget for the decorating and furnishings so that you can see exactly where your money is going and on what. Splashing out £1,000 on a kitchen tap might seem like a great idea but not when you put it into context of the other costs involved and the need to not go over budget. Desire is one thing but being practical and mindful is what will make your project a success and minimise stress levels.
In summary, there is a lot to consider when making your property work for you and I hope this has given you food for thought, and even the confidence to undertake your project. If it has made you think that you need some help, then VA Heritage would encourage you to speak to a professional. They will not only get you the results you need, they will also make it an enjoyable experience.
VA Heritage can help with all the above.
If you have any design questions for Alexis at VA Heritage, call 07776 358 475 or visit vaheritage.co.uk
If you wish to appear in our newsletters please contact us here
Telephone: 01423 593 794
Locksley Park
Blind Lane
Tockwith
YORK YO26 7QJ
Opening Times:
Mon to Fri - 9.00am to 5.00pm
Bank Holidays - Closed
Christmas 2025- TBC
Oak By Design is the trading name of:
Oak By Design Ltd.
Reg Number: 04384416
VAT Number: 664 8012 33
Left us a star review
From the initial quotation right through to the delivery and after service Joanne has been brilliant and given me an excellent product. I have just ordered another porch for another project from them and I will continue to do so for future projects . Thomas and Bell Building Contractors Ltd
On behalf of Shears PHG Our customer was looking at having an oak porch built for their property in the West Midlands we got in contact with Joanne at Oak by Design and she was really helpful, always friendly on the phone and polite nothing was too much trouble. Joanne kept us up to date through every stage and our customer is really pleased with the results of the Porch it looks great and we wouldn’t hesitate to use them again in the future
From start to finish Oak By Design have been incredible, nothing was too much trouble. Our new Oak doors are beautifully made and have really been the icing on the cake to finish our house renovations off. We have also had a fabulous outdoor oak structure with heating and we are very much looking forward to making the most of it in the months ahead. Thank you to the whole team I would throughly recommend.
We have been impressed from the first contact with Oak By Design, first class customer service and the product speaks for itself. We found it straight forward to install and the support was always there if we needed it. Brilliant, we could not recommend enough and will use them again.
We were looking to have a bespoke oak and glass atrium for the front of our new house renovation. We wanted to find a company we trusted, who clearly understood our brief and could manufacture and install a high quality product at a competitive price. A big ask, but OakByDesign ticked all our boxes. Jamie and the team from the initial discovery meeting to completion of the installation were fantastic. The design, material quality and installation were first class and I would highly recommend you to include them within your project plans. Thank you all. Ben and Lindsay.
On behalf of John Docherty: Oak By Design were a great company to deal with; helpful, knowledgeable, professional. The quality of the oak supplied to us for our bespoke porch was first class. Nothing was too much trouble for this company, and we will definitely be using this wonderful company again in 2022.
Outstanding customer service from a company that truly cares. I’ve only dealt with a small amount of companies where buying experience totally outstrips the monetary value & this is one of them.
Fantastic service and quality of product. I couldn’t be happier with my Oak porch, which was designed to my specification with the minimum of fuss. Joanne was so helpful and nothing was too much trouble. Incredibly well engineered and looks fantastic. Thank you so much.
Excellent quality workmanship and materials. Very easy and friendly to deal with on the phone. Everything done on time and no problems at all. Will definitely use again next time I need an oak porch or any other oak structures.
From the start of our enquiry, the service provided was excellent. Joanne was a great help and the oak porch structure looks fantastic on our new build. It completely changed the look of the house. Very quick delivery could not recommend enough.
We ordered two bespoke doors and two bespoke porches for our house build from Joanne at OByD. We were specifically delighted with Joanne's attention to detail (and patience! lol) making the overall customer experience excellent. The product was equally fantastic, the product quality was truly beyond our expectations. Joanne is super helpful and knowledgeable, and kept my spirits up throughout our project. We would 100% recommend OByD, and specifically Joanne, for all your standard and bespoke oak requirements. H&D
First class service and product . Our car port and steps look fantastic and blends in with the existing buildings beautifully. Would definitely recommend them.
Working with Oak By Design on our project was a pleasure and we were delighted with the results. Joanne was extremely helpful, quick to answer any questions and generally a great person to deal with! The quality and finish of the products - RSJ covers and Oak Windows & Doors were superb and look great. Would highly recommend working with Oak By Design and would not hesitate to use their services again for future projects!
My client was looking for ways in which to make his conversion (of an early seventies house into a period family farmhouse) “stand out from the crowd”. whilst maintaining a commercial eye on his expenditure, as the house was being converted for resale profit. Making the choice to meet with Richard and explore possibilities for incorporating some Real solid Oak features into his plans proved to be the making of the project. By taking lots of advice from Richard on both the size and structure of the components we were able to incorporate three key features. The beautiful and bold roof trusses and purlins for the open plan kitchen are simply a joy to behold. The stunning full height gable window which is directly glazed into the large framework can be appreciated from both the the kerbside and of course from within the cosy snug on the ground floor or the amazing first floor main bedroom where we incorporated some additional exposed roof beams just purely for effect. All in all it is fair to say that these significant choices certainly created the wow factor my client was looking for. Having managed to pre sell the property well before completion it in itself demonstrates the benefits of keeping these sorts of real oak features as part of a modern build. I have no hesitation whatsoever is saying that if anyone is looking to get advice and is serious about investing in quality oak products they should have no need to look further than Oak by Design. Thanks again Richard for all your help , guidance and continued support which is a credit to you and the craftsmen you employ.
A great company to deal with. Professional from start to finish and always there to assist with any queries. Highly recommended.
Found Oak by Design searching for a new front porch to replace a canopy and knew immediately that this was company for the job and I was not disappointed. I already knew what I wanted and Richard, very patiently, developed my basic requirements, with a number of iterations, into a full detailed design. As I live outside their site working area I decided go for supply only and to install the porch myself. It was delivered as promised and it looked great even on the pallet! It took me a while to fit but it was very satisfying and the result is fantastic. The quality of the aged oak and carpentry of the timbers is excellent. I’m delighted with the porch supplied by Oak by Design - it looks superb.
Very impressed with Oak By Design. Customer service is fantastic and they were very patient in helping me ensure what I needed was the right size. Photos sent of oak cover before it was sent to me and end product was great. It was also not the most expensive either. Would definitely recommend.
From the moment we visited the Oak Design showroom, we knew that we were dealing with a top quality local company. Richard the owner, showed us around his design works with real pride of his product and service offering. Jamie as sales executive has discussed and agreed the options & design with costs to us and we have now implemented the first phase of our home improvement, with more work to follow. We are highly delighted with the finished product and would strongly recommend Oak Design to other interested clients. I also suggest that you pay them a personal visit at the Home Building & Renovation exhibition in Harrogate, as well as their wonderful showroom of Oak Solutions in Tockwith to get a personal guided tour.
Fantastic service from start to finish, I would have no hesitation in recommending this company or using them again. Very professional and helpful. Joanne was great in assisting us with choosing both styles and colours of the beams and cladding.
Found this company by accident whilst passing through Harrogate, but well worth a visit.Great products choice with helpful friendly service. The wooden flooring and beams look great in situ and we are very pleased with the transformed room. Would recommend and use again.
Great company. Awesome flooring, we are very, very happy with the outcome. And great price which is always a bonus. Staff knowledgable & efficient.
Four years ago we took the decision to completely gut an old farmhouse and start again with it, we started looking for a supplier of oak to refit all of the internal doors, door casings, skirting and flooring. Our carpenter recommended Oak By Design. He wasn't wrong! All of the oak has been completely top notch. As the old house has settled into it's new skin it has moved and cracked in various places, the only thing that has been stable and unwavering is the oak. The customer service has been superb, with them continuing to supply exactly the same items, with the same quality over the course of 4 years. They even indulged our designs for furniture for our "boot room", with Shoe pigeon holes and a bench which we could store wellies under (as pictured). The doors supplied by them are reassuringly heavy and sturdy, with a proper "thunk" as you close them, cutting off sound from the rest of the house. There may be other, cheaper suppliers of oak out there, but none with the same level of quality, longevity and customer service as Oak By Design. If you want to do it right (& once!) use these guys.
Really delighted with the new porch by Oak by Design. It adds a super feature to my converted barn. Thanks to Joanne and the team.
My wife and I recently purchased an oak porch from Oak By Design. We are delighted with the porch and it has been much admired. We did get some help assembling it but everything fitted together perfectly.
We got a fantastic garden structure from Oak by Design. It is a very handsome building and the design process was very patient, to say the least. We didn’t really know what we wanted, so we had to be guided through it. And we are delighted.
Spectacular service from start to finish! great design work and support from concept to installation. The builders were amazing! So pleased with the outcome! Thankyou so so much !
Amazing craftsmanship from this company. The customer service from Joanne was superb. My questions and indecisiveness were never an issue and she was always on hand to offer advice and find the answers to my questions. Our oak porch has transformed the house and we are over thd moon with it. Would highly recommend Oak By Design. Joanne is an asset to the sales and promotion of this company and is very knowledgeable. Would give 10 stars if I could!
What can I say, Oak By Design have been the most fantastic company to deal with. Joanne was so helpful, friendly and professional. She really seemed to care about our project, which made such a difference. We had 4 oak RSJ covers made and 2 fireplace mantles. The finish is outstanding. Everyone believes they are solid beams, which was just what we wanted. The care and attention this company will give you is 2nd to none and I would highly recommend them. Pictures will follow when we complete our project, thanks again Oak By Design. x
Oak by Design have made 2 oak framed rooms for us, sunroom at the front and and "moonroom" (photo) at the back which encompasses a shower room, work area and storage. They have been helpful at every stage and the outcome is simply brilliant. They make the whole house feel roomier and brighter and are beautiful places to be. GE North Yorkshire
A first rate service from start to finish. We've used this company in the past for our floor - 40 foot of solid oak! 2 beams and 2 RSJ covers. This time a beam for our new kitchen inglenook and another RSJ cover. More than impressed with the products which more than met our spec. A very friendly and helpful team who I'd recommend to anyone.
Ordered an oak mantle beam from Oak by Design and they quickly called to check the finer details. Unfortunatly, the beam was slightly damaged on arrival by the courier company. Oak by Design immediately arranged to have it picked by DHL, transferred back to Yorkshire from Kent, repaired and sent back within 2 days, with no quibbles. The beam is beautiful, as is the high quality customer service by these people. Fully recommend using this company. Anthony Slater, Tonbridge. Tonbridge.
When embarking on a large renovation project assembling the right team of skilled work people is vital. It involves the need for skill, imagination and trust. It was important to us to use a local company and Oak by Design seemed to tick the right boxes although we had not dealt with them or indeed heard of them before. We soon came to realise that the combination of Ben, Billy, Jamie, Matt and MIck ( listed strictly in alphabetical order ) was a great success. Skilled: highly, imaginative: an excellent creative talent, trustworthy: 100% but also such great team players that all the other trades on site benefitted from their cooperation and great good humour. I would endorse the other reviewers who have commented on the quality of the materials used, whether in the replacement windows, the light oak internal doors. the fantastic oak staircase, the secret bookcase and the pièce de résistance: the oak conservatory. It has been a great project and much of that I attribute to the work of Oak by Design. A big thank you to you all.
We purchased some engineered oak flooring and oak covers from Oak By Design and couldn't be happier with the finish and quality. They are spot on. Joanne was extremely helpful throughout the whole process and provided plenty of advice when necessary. Thank you
Oak by design provided our engineered oak flooring. From our initial meeting and supply of samples to the final delivery we have been provided with excellent service. Carl has been in touch throughout the process and provided updates about the lead time and expected delivery dates. We are delighted with the flooring. Very happy to recommend Oak by design.
Great service from start to finish, Joanne was great help. Designs were spot on and so happy with the porch. 10/10. Fully recommend.
Posting on behalf of my Mother in Law, Shirley Abbott "Having planned to shop around, Oak By Design was my first stop. I had no need to look any further. Joanne patiently and professionally guiding me through the confusion of choosing the right flooring. The service and support from the staff was exceptional, efficient and helpful. And - my floor looks amazing!"
Firstly, the product quality was superb, a beautiful oak mantle piece for my fire place, gorgeous. The installation was quick, efficient and fitter very friendly. The price was very reasonable, actually very good value. But what makes it all SIX STAR, ( but we I can only give 5!), was the customer service. When walking in the shop I was perfectly attended to, I was given samples to take home and they remembered to call soma days later to see what I thought. Order to install time was very fast for such a bespoke service. My experience was world class, great to deal with a brilliant local/small business, I totally recommend.
I first used Oak by Design in 2021 for a oak porch, I used them again 2023 for an oak pergola. Both times my clients have been Delighted with the finished product. Both times the product was delivered when stated, everything i needed was on the delivery. Oak by design listened to what I required for both jobs. The quality of the oak is excellent, all joints fit correctly & if I had a problem I only had to ring and speak to them. R Brown Carpentry always recommends Oak by Design when asked about oak structures.
Great service by a friendly professional team, a pleasure to work with. The end result of our oak glazed leisure spa and outdoor kitchen looks fantastic. Great job
We worked with Jamie from Oak By Design on a super project near Wetherby. There was plenty of oak in this design for the team to really show their worth - and they did. The attention to detail was excellent. If anything was not quite how the client wanted it, they were straight back to attend to this. The customer care was superb. We look forward to working with Oak By Design on another project soon.
I firstly used oak by design a couple of years ago for an open oak porch. They were extremely helpful and everything was delivered on time to the highest quality. The porch went together with the oak dowels provided and looked great when it was all slated in. They have also supplied me with a oak beam for a fireplace natural random finish and it looks good.
A fabulous service and supportive through the design and delivery process. Highly recommended
We can thoroughly recommend Oak by Design. Not only did they provide the best of oak floors and oak staircase to suit our new, contemporary home, but they returned to make good a problem which was not their fault. Going the extra mile separates great companies from ordinary firms. Thank you Jamie & Billy. From Mike & Barbara, York.